
We are unable to reply to comments, so please message us directly if you have a specific question regarding products, shipping costs, etc. Our office number is (480) 207-1511. Our email is hello@spencertified.com. You can also message us on Facebook. Commonly asked questions and answers can be found on our FAQs page here.

HOW TO SET UP A STEREO RECEIVER
THIS GUIDE WILL WALK YOU THROUGH THE BASICS OF HOW TO GET YOUR RECEIVER HOOKED UP LIKE A PRO
Congratulations! You’re the proud new owner of a stereo receiver, and you’re ready to delve into the exciting world of home theater. Except…you’re not too sure what comes next. Getting a receiver seems easy at first glance, but once you actually sit down to set everything up, it can become intimidating. But never fear! We’re here to break it all down for you so you can get your receiver up and running.
Let’s walk through the basics along with some tips and tricks.
BEFORE GETTING STARTED

Before you start plugging wires into connectors, you have to unpack everything. This may seem like a too-obvious first step, but you’ll want to make sure you have all the accessories that the receiver came with at hand. This can include manuals, a remote control, a power cord (if detachable), audio/video cables, AM and/or FM antennas, and Wi-Fi and/or Bluetooth antennas (if not attached to the receiver). If you’re missing anything, like a composite or an HDMI cable that you know you’ll need, be sure to get that first.
Pro Tip: Read through the User Manual and/or Quick Start Guide first! If you miss a step, it can cause you a major headache later on.
Then if you haven’t yet already, decide where to place your receiver. We recommend choosing somewhere well-ventilated with enough height to raise any attached antennas. Being able to easily access the back of the receiver to plug everything in is a bonus. If that’s not possible with your setup, then attach all your cables and wires before you place your receiver into its new home.
Finally, gather up and label your cables and wires. Figure out your speaker placement then make sure you get the right amount of speaker wire for the job. Label all your cables at both ends to make it easy to keep track of what plugs into where. This will help you a great deal in the future too if you ever move or replace your receiver!
CONNECTING YOUR ANTENNAS

Once everything is gathered and ready, you can start by connecting any antennas that came with the receiver. This includes any AM/FM, Bluetooth, and Wi-Fi antennas. Many home theaters also have an Ethernet / LAN port. So if your wireless network isn’t up to par, you can just directly connect to your route with an ethernet cable.
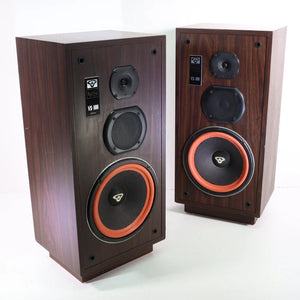
CONNECTING YOUR SPEAKERS

To connect your speakers, match the speaker terminals on the receiver to those on your speakers. Most receivers have them labeled, making it a little easier on you: connect your front left speaker to the main left terminal, your center speaker to the center channel terminal, your back right speaker to the surround back right terminal, etc.
Be sure to also check and double check the speaker connection polarity. Red is positive and black is negative. It can only be connected red to red and black to black. If the polarity is switched, the speakers will have an inaccurate soundstage, poor low-end frequency production, and (in short) sound terrible.
CONNECTING YOUR SUBWOOFER

After your speakers comes your subwoofer. Instead of using the same terminals as the other speakers, you connect your subwoofer by running an RCA audio cable from the subwoofer’s LFE input to the receiver’s connector labeled subwoofer, SW, or L/LFE.
CONNECTING YOUR TV

Most home theater receivers are now equipped with HDMI, which makes connecting your television to your receiver a breeze. Just connect the HDMI output on the receiver to one of the TV’s HDMI (HDMI-ARC is best) inputs. If your receiver doesn’t have any HDMI outputs, then you can use the composite audio/video connection labeled TV or TV/CBL.
You want to make sure connecting your television is part of your initial setup. Most modern receivers have on-screen guides that walk you through the setup process. This user interface will help you select a language, connect to the internet, and download any updates. Just plug in and turn on your receiver, turn on your TV, select the correct input, and follow the on-screen guide. More advanced receivers will even prompt you through preparing, connecting, and finishing your source components!
CONNECTING YOUR SOURCE COMPONENTS

Once you’ve hooked up the essentials, you can have fun plugging in all of your sources! This includes any audio / video components you will be using to listen to music, watch TV shows, watch movies, or play games. These include CD players, DVD players, Blu-ray players, cable and satellite boxes, games consoles, and more.
Connect your components using the on-screen guide if available. Depending on the type of component, you’ll connect them using HDMI (such as for Blu-ray players), analog stereo (for CD players), and composite (for DVD players).
FINISHING UP

Amazing! You’ve connected everything you need to. Once you’re done wiring up, you’ll still need to fine-tune your system and set the speaker levels. Modern home theater receivers will help you with this. Some have an incredible room calibration set up using a microphone, others offer an on-screen menu guide, and still others will have a built-in test tone generator to manually balance the speaker levels.
Once you are finished with that and are happy with everything, you can push your receiver back into your entertainment center if you haven’t yet already. For those messy cables and wires, we recommend tying them up or using cable tunnels so they’re not a tripping hazard and so you can focus on the beauty of your new home theater system!
IN SUMMARY
We hope you’re feeling more comfortable about setting up your receiver! It can be a bit tricky and time-consuming your first time, but once you’re set up, then it all becomes well worth it.
This guide is just the tip of the iceberg - more advanced options can include multi-zone setups, compressed music enhancement, and amp assignment - and the set up process will differ depending on brand and model. However, hopefully this guide helps you understand the basics so you feel more at ease about installing your home theater receiver. Remember: you can do this!
At SpenCertified, audio and video gear is our specialty, so if you’re interested in shopping for amplifiers and receivers to begin building your home theater system, you can view our wide selection of them here. We also sell different kinds of speakers from bookshelf pairs to center channels to floorstanding towers. Perfect for delving into the world of home audio!
Or if you’re new to audio systems and want more background reading, you can check out our article “Stereo Gear Jargon: Words to Know Before Buying a Receiver or an Amplifier” here.
Leave a comment