We are unable to reply to comments, so please message us directly if you have a specific question regarding products, shipping costs, etc. Our office number is (480) 207-1511. Our email is hello@spencertified.com. You can also message us on Facebook. Commonly asked questions and answers can be found on our FAQs page here.

JUST FOR THE RECORD: HOW VINYL RECORDS ARE MADE
THE MAKING OF VINYL RECORDS? GROOVE-Y!
A vinyl record’s grooves are the heart and soul of its music. Watching the needle glide along as the record spins provides the nostalgic, tangible ritual that people have been addicted to for decades. But how did these grooves get etched into the disc? How does a 12-inch LP go from an indistinct blob to the record that spins out music on your turntable?
Surprisingly, the process hasn’t changed all that much. Today’s record pressing plants use roughly the same traditional methods and machinery as those during the 60s and 70s. It’s an incredible process, so we’ve broken it down step by step so you can learn the fascinating art and science behind the making of the vinyl record.
STEP 1: BEFORE THE BEGINNING

The first step, of course, is recording the music inside a studio. After that, the fun starts. Before the actual vinyl can be created, however, a mastering engineer needs to adjust the frequencies, dynamics, and sonic tonality. The levels and tonality must be consistent from song to song. While mastering must be done whether it’s for analog or digital, the process is a little different for vinyl for a few reasons.
First, vinyl records can’t produce the same frequencies as digital recordings. Frequencies that are too high or low, or ones that are just too loud, can cause the sound to be distorted and the needle to skip.
Second, the circumference of the grooves decrease as you move closer to the record’s middle. This means the resolution and sound quality diminishes as the needle travels inwards, which can affect song order choice.
Third, once the needle reaches the end of a side, that’s it, and the record needs to be flipped. This means artists and producers need to consider song length when deciding which track will go on which side.
STEP 2: MASTER THE DISC

Once the music is mastered to satisfaction, then the next step is to create the master disc. It's from this disc which all future vinyl records for that album are born. It’s an aluminum plate coated in lacquer, which is cut by a cutting engineer to become the master disc.
This is the cool part: the plate is cut out in real time, as the music is playing. It’s done using a cutting lathe, a special machine that carves the grooves into the disc. By converting sound waves into vibrations that makes cuts in the plate, the music is captured. Groovy, right?
Everything from start to end must be done carefully: the space between songs needs to be done manually, the engineers wear anti-static clothing and silk gloves, and the sound levels need to be monitored. Otherwise, the slightest imperfection will cause the record to have distortion or excessive pops.
STEP 3: STAMP IT OUT

The third step is to create stampers. These will be used to press the grooves from the master disc into blank vinyl discs, which result in the discs you’ll own - if everything goes correctly.
To get the stamper, the master disc needs to be cleaned, coated with liquid silver, dipped into pure nickel, and electroplated. This last step will cause the nickel to fill the grooves on the disc. Once removed from its pleasant electrified bathwater, engineers can separate the metal layer, creating two discs that are mirror images of each other. The new disc will have ridges then, instead of grooves.
Any excess metal is trimmed, and the engineer makes a hole in the center. This becomes the stamper for pressing new vinyl records. They can only produce around 1000 records, however, before audio quality is impacted, so record manufacturing plants often create multiple stampers.
STEP 4: PRESS AND REPEAT

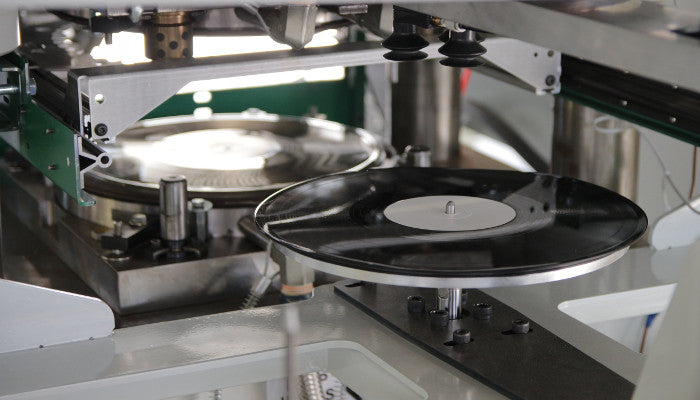
Once the stampers are completed to satisfaction, it’s time for step four: pressing the records! The vinyl itself actually begins as small “biscuits” or blobs of polyvinyl chloride (PVC). The most common color is black, but other colors can certainly be used. Then once the printed labels are ready to go (they must be baked to remove moisture), the vinyl can finally be pressed.
The stampers are loaded onto the record press above and below the blob of vinyl, with the record labels loaded between the biscuit and the stamper. The stampers then press the vinyl biscuit under massive heat and a ton of pressure - or, we should say, 100 tons of pressure. Flattening the blob and pressing the ridges firmly into the vinyl forms the grooves. Any excess vinyl is trimmed, and the new vinyl is cooled.
This process of pressing vinyl only takes about half a minute.
STEP 5: FINISHING TOUCHES

The final step is to run a thorough inspection. Vinyl records have more room for error when compared to CDs or digital releases, so it’s important for record pressing plants to do internal checks and send out a few pressings to the artist and record label. They check for excessive pops, extreme distortion, and any mistakes in the tracklist. Once approved, the vinyl plant can mass produce more copies.
Records are placed into inner paper sleeves, which are then placed into album covers, which are then shrink-wrapped. Finally - finally! - they’re ready for distribution. Then it’s just a hop, skip, and a jump to a seller near you.
SUMMARY
Dropping the needle onto a record and letting that rush of warm music fill the air is an addicting experience. The process to get that music from the studio to your living room’s turntable is incredible. It takes time, patience, and dedication to get a vinyl record ready for distribution. It’s an art form, and one that’s survived the test of time. We hope it’ll continue to survive for a long time to come.
Thanks for reading! We hope you found the process just as interesting as we did. If you’re looking to get into the world of vinyl and want a nice vintage turntable to play it on, please consider checking out our collection of turntables and record players! You can find them here.
Have a great day!


Leave a comment