We are unable to reply to comments, so please message us directly if you have a specific question regarding products, shipping costs, etc. Our office number is (480) 207-1511. Our email is hello@spencertified.com. You can also message us on Facebook. Commonly asked questions and answers can be found on our FAQs page here.

TURNTABLE PLACEMENT: 3 RULES FOR KEEPING YOUR TURNTABLE HAPPY AND HEALTHY
THESE THREE EASY RULES WILL HELP YOU POSITION YOUR TURNTABLE LIKE A PRO
If you’re new to the world of vinyl - welcome! Once you’ve got a turntable, speakers, and some records, it’s easy to get swept away by the excitement. But once you go to actually place your turntable, you might hesitate a moment. It’s fine to set your turntable, speakers, and receiver onto the same old coffee table and call it a day, right?
Wrong! Doing that can impact sound quality and strain the turntable’s mechanisms over time. But never fear - that’s why we’re here.
Perfect for both beginners and those needing a refresher course, this simple three-rule guide will help you learn the best way to place your turntable, protecting your investment for years to come.
WHY IS THIS IMPORTANT?
Turntables are sensitive. While built to last, particularly the good ol’ original vintage ones from the 70s, they still have delicate mechanisms and components that you need to be mindful of if you want your player to stand up to time.
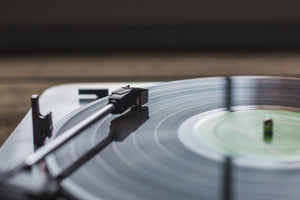
The way turntables are designed, a record sits atop a platter that must spin at a constant and consistent rate in order to produce a clear sound. Factors like interference and vibrations impact sound quality and stability, potentially creating tracking issues and tonearm friction. This may hinder your turntable’s ability to accurately play records and will negatively impact its structural integrity over time.
RULE 1

First, you want to find a sturdy, stable, and level surface to place your turntable upon. A stable turntable is a happy turntable. Don’t place it on a lightweight or thin shelf that will shake every time someone walks by. Instead, place it on a heavy, flat surface, which will lessen the impact of vibrations and ensure the mechanisms of the turntable work as they should; it will absorb the vibration so that your turntable doesn’t have to. You can improve the stability of your turntable as well with isolation feet or an isolation platform.
The level part is vital as well. Not leveling your turntable will lead to tracking issues such as skipping, warbling, and distortion. Many turntables have adjustable feet, making it easier to level. Just grab a bullseye bubble level or a ruler, and measure each corner. Adjust the feet as needed to make sure the turntable doesn’t lean incredibly to one side.
RULE 2

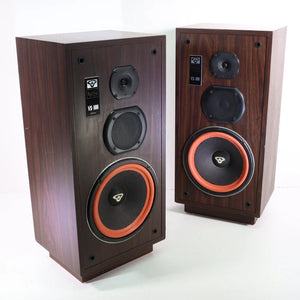
Second, never place your turntable on the same surface as your speakers. Or, we should clarify, on top of the speakers themselves. Turntables are designed to pick up vibrations from the spinning record while playing to translate them into sound. So external sources of vibration will interfere with your turntable’s performance. And if you place your turntable on the same shelf as your speakers, they can cause vibrations that may make your records skip or scratch.
Floor-standing speakers make it easy to separate the two - just don’t set your turntable on the floor! But if you have bookshelf speakers, place them on a different shelf or an alternate surface if you have the space. You can also avoid vibrational interference by using speaker stands or placing isolation pads under your speakers.
Speakers can cause a great deal of vibration in a stereo system, which is why placing your turntable on a separate surface will help keep the audio clear and prevent any interference from muddying the turntable’s beautiful sound.
RULE 3

Third, don’t place your turntable on top of another component. It can be tempting to put your turntable atop your amplifier or receiver, or even stack it with a CD changer, cassette deck, and other equipment to save space. But this is something you want to avoid for a few reasons.
As mentioned in the previous two rules, you don’t want the turntable to vibrate at all. But placing your turntable on top of a high-powered unit like an amp can also cause your turntable to overheat. Plus, covering up the air vents of your receiver can cause damage to that piece of equipment as well. Finally, you want to avoid interference. The turntable’s tonearm and cartridge should be isolated from sources of electrical noise. This can be in the form of amplifiers, TVs, and routers. Instead, place your turntable directly on a sturdy, stable shelf. This will reduce buzzing and keep your turntable happy and healthy.
IN SUMMARY
Turntables are a sound (pardon the pun) investment. They need regular service and care if you want them to remain in good condition. But regular upkeep is just the tip of the iceberg - if you've got the space, you also need to keep placement and positioning in mind.
Glossing over turntable placement is an easy mistake for casual listeners to make, so we hope this guide helps! Just follow these three key rules, and you’ll have your turntable set up like a pro in no time.
Ready to take the dive into the wonderful world of vinyl? In the market for a nice vintage turntable to play your records on? We’ve got you covered! At SpenCertified, we’re experts at vintage audio and video gear, and we have a wide selection to choose from. You can find all of our turntables and record players here. Thanks for reading! Have a great day.


Leave a comment